

A loading animation is helpful when using LLM connections like Gemini or ChatGPT. This feature creates an impression that an official LINE OA account is typing in the chat window. It appears immediately after a user sends a message, with customizable durations (from 5 to 60 seconds) before sending the response generated by the LLM.
For more information about the API, refer to: LINE Document: Display a loading animation. If you haven't connected your LINE OA account to Gemini yet, learn how to do it without coding through Botnoi.ai: How to Connect LINE Chatbot with GEMINI (GEN AI) Without Writing Code.
Steps by step : Display a Loading Animation in LINE OA
Step 1 : Understand the API
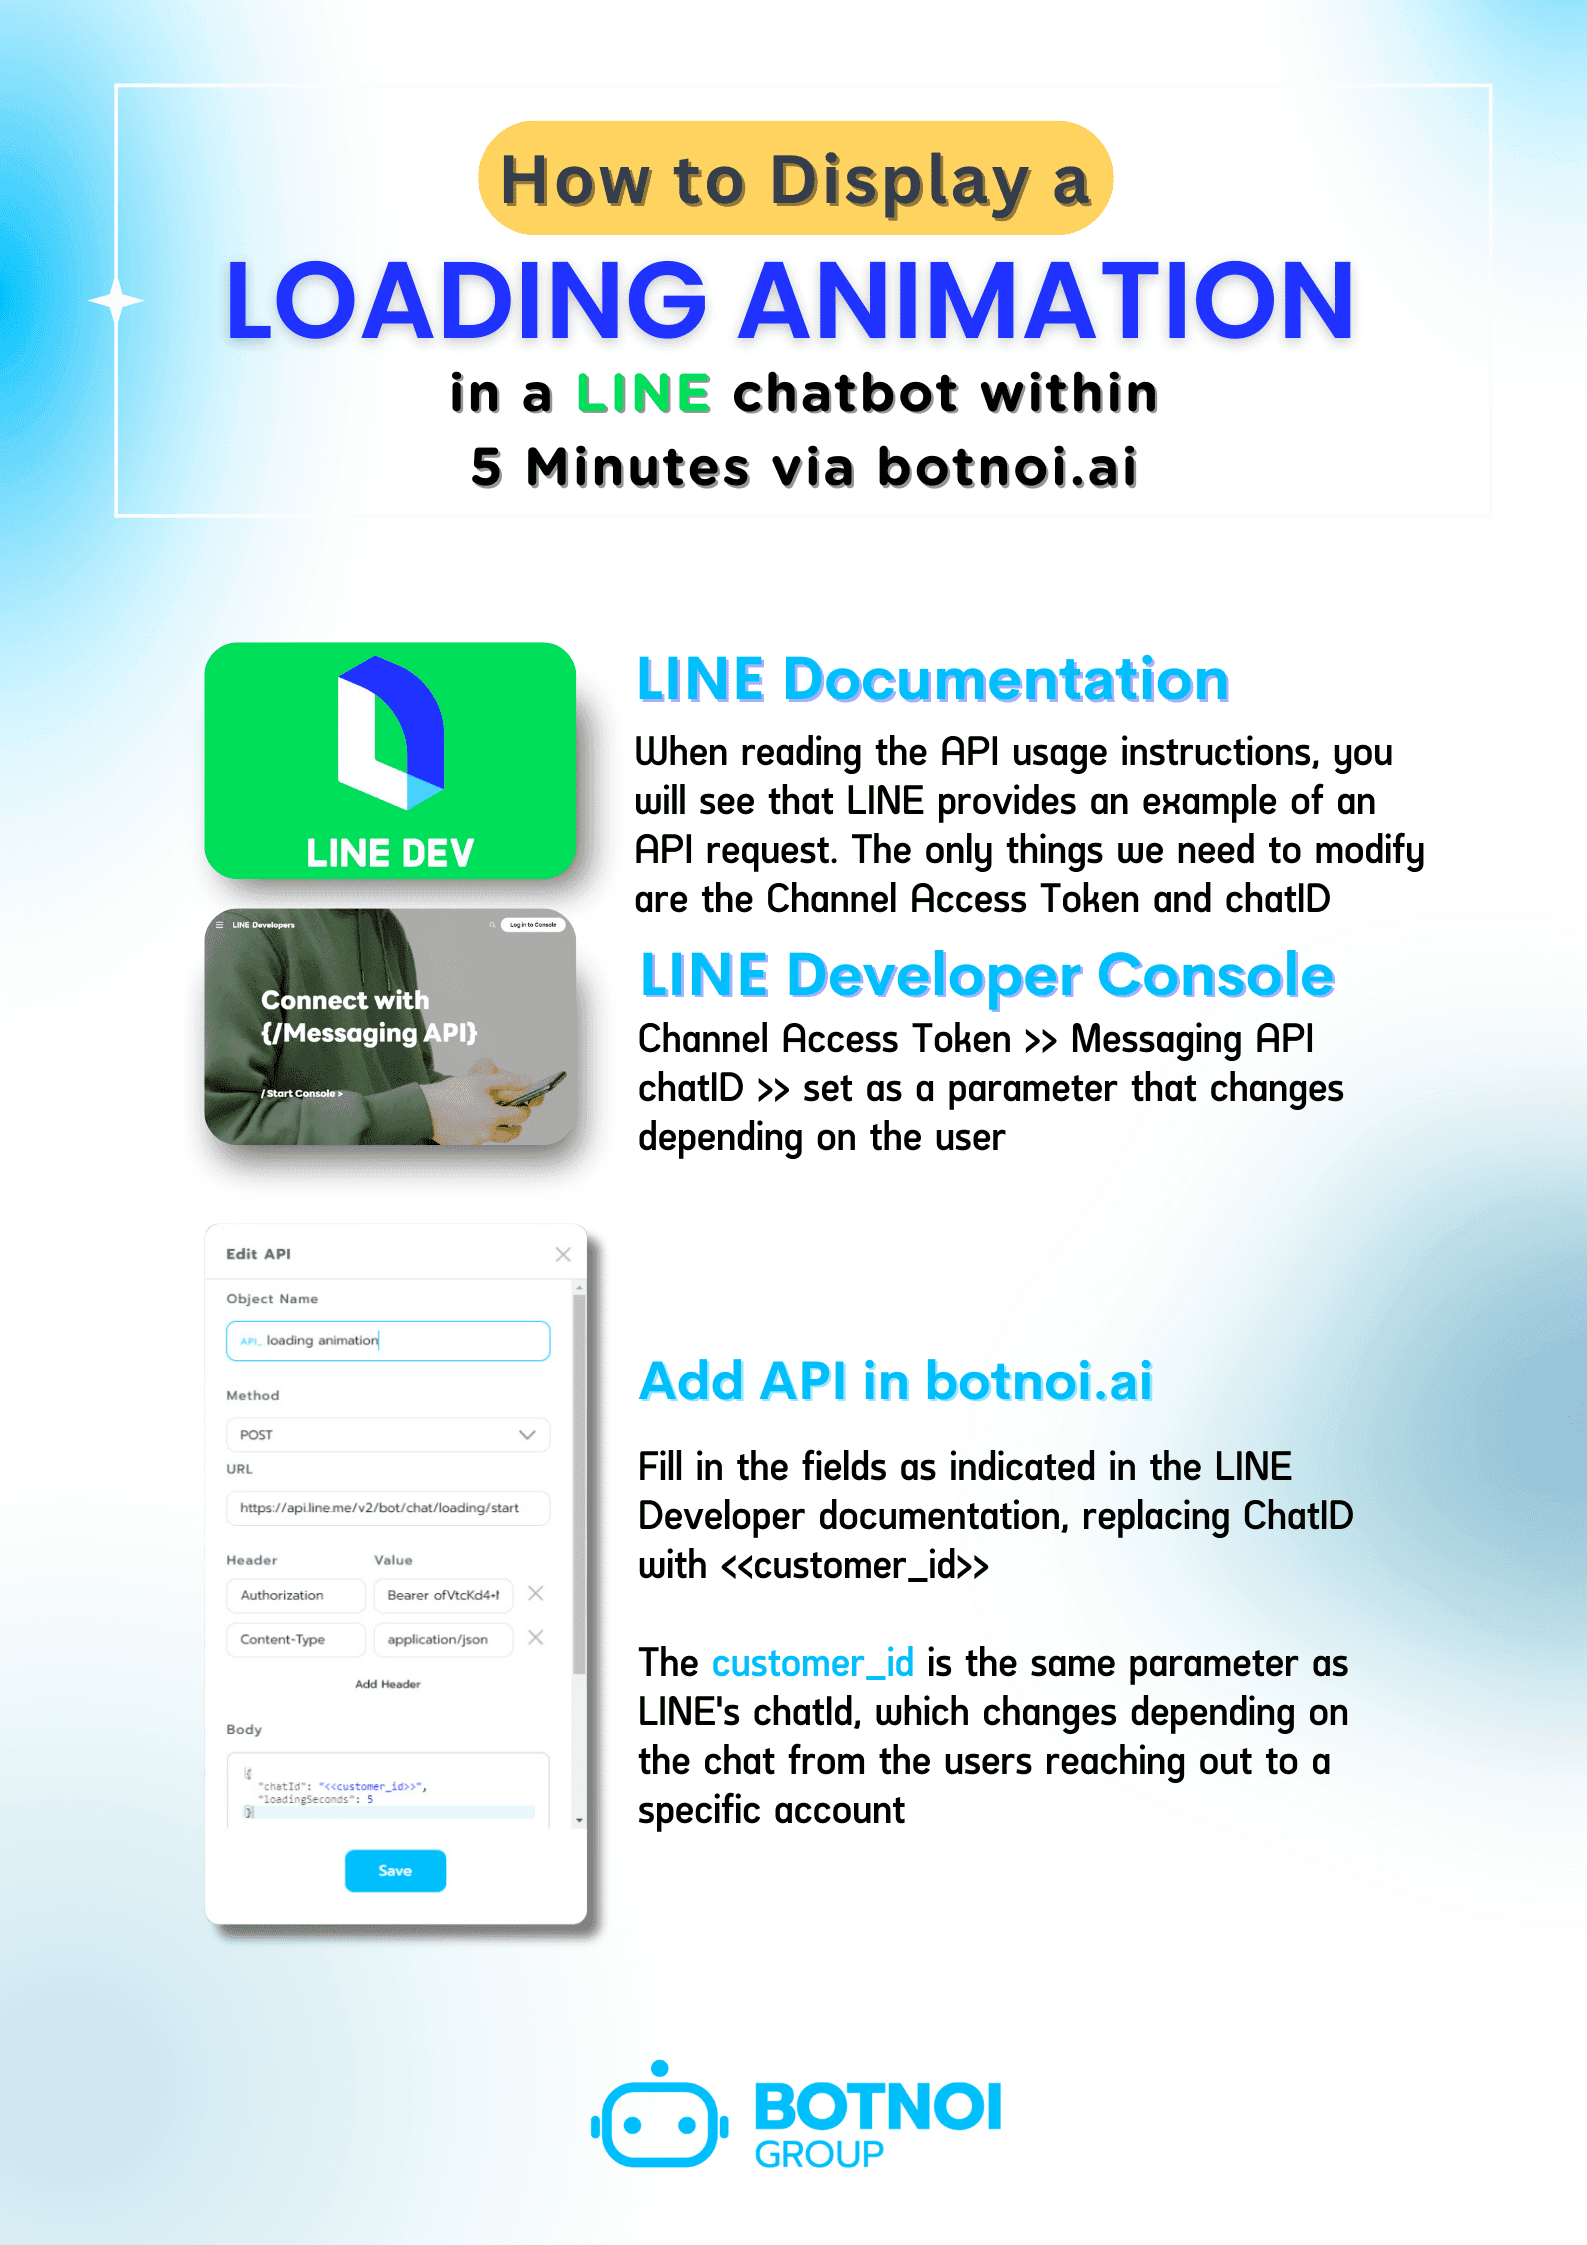
In the official LINE Developers documentation for calling the Loading Animation, the necessary elements are chatId and channel access token.
The loadingSeconds parameter can be set to specific values: 5, 10, 15, 20, 25, 30, 35, 40, 45, 50, 55, or 60. The default value is 20 seconds if not specified.
Step 2 : Prepare Information
Visit the LINE Developer website and log in. Select the Channel and the account where you need to connect the API to use the loading animation.
To find the Channel access token: Choose "Messaging API," then scroll down to the bottom to find "Channel access token." Click "Copy" to copy the token for future use.
The chatID parameter is derived from the customer_id parameter within Botnoi.ai, allowing it to display in the chat window for each user.
Note: customer_id is equivalent to LINE's chatId, which changes depending on the users who interact with an account.
Step 3 : Add API in Botnoi.ai
If you don't have a botnoi.ai account, find out how to set it up here.
After logging in and selecting the chatbot connected to your LINE OA, add the API:
Select the POST type for the API.
Enter this URL: https://api.line.me/v2/bot/chat/loading/start.
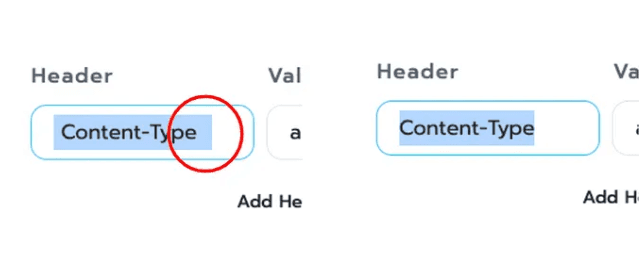
Add the information in the Header and Body section
Replace the Channel access token obtained in Step 2 as indicated in the image.
Change chatId into parameter <<customer_id>>.
Name the API and save it.
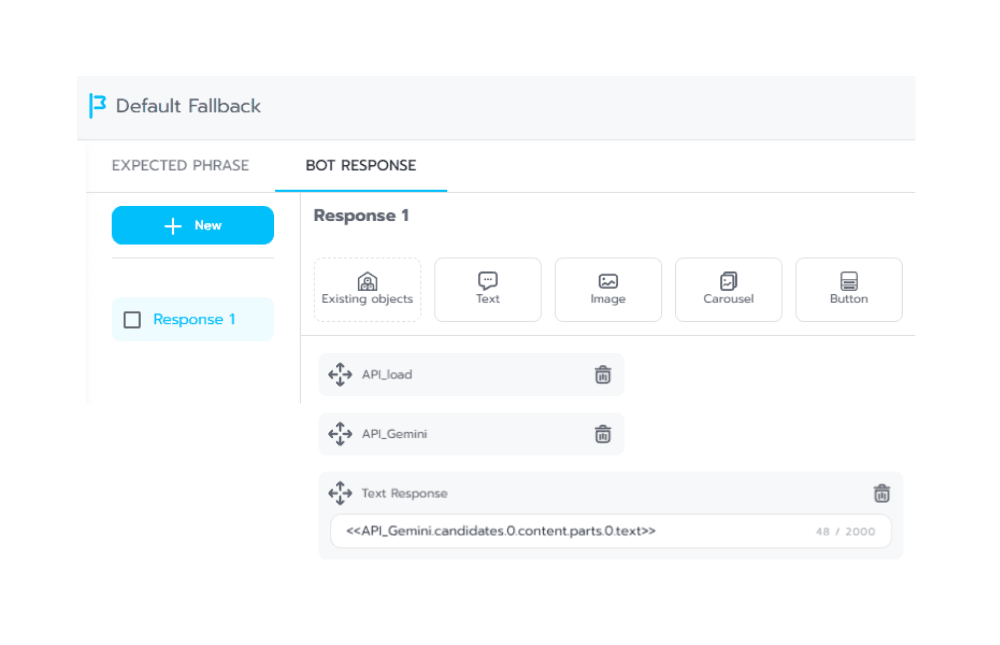
Step 4 : Implement in Botnoi.ai
Go to the intent where you've added the API that connects to Gemini (Gen AI). Under "Bot Response," add the API by choosing "Existing Object > API > find the named API from Step 3 > click Add."
After adding the object, the newly added API appears at the bottom. Drag the Loading Animation API before the Gemini API (as shown in the image). After adding, save the information and test the chatbot.
Common Issues and Tips:
Botnoi.ai must connect with LINE OA using “Manual Setting Connection” to ensure the correct chatId format: U[0-9a-f]{32}.
Follow the sequence of API calls as specified in Step 4.
Be careful not to add extra spaces when adding the API.
With these steps, you'll have a loading animation for use while waiting for the bot's response. And If you like this article don't forget to follow us on Facebook : Botnoi Group for updates.
กลับ


