
AI Chatbot By BOTNOI
Feb 5, 2024
Hey there! Ready to create a smart and dynamic chatbot? In this tutorial, we’ll show you how to pull data from Google Sheets into Flex Messages using Botnoi.ai. Don’t worry if you’re new to this, our step-by-step guide and helpful images will make it easy to follow along.
This method we use is convenient and fast and ensures that any updates in Google Sheets are automatically reflected in the Flex message. This approach makes it easier to create efficient and user-friendly chatbots, as confirmed by the Botnoi chatbot team!
What does Flex Message look like showing data from Google Sheets?
In this first episode, we designed a Flex Message to be used alongside a Dialogue that collects user information. The stored information can be displayed again using variables or parameters, allowing users to review their data before it is submitted to a database. Here, we will use Google Sheets to store our data.
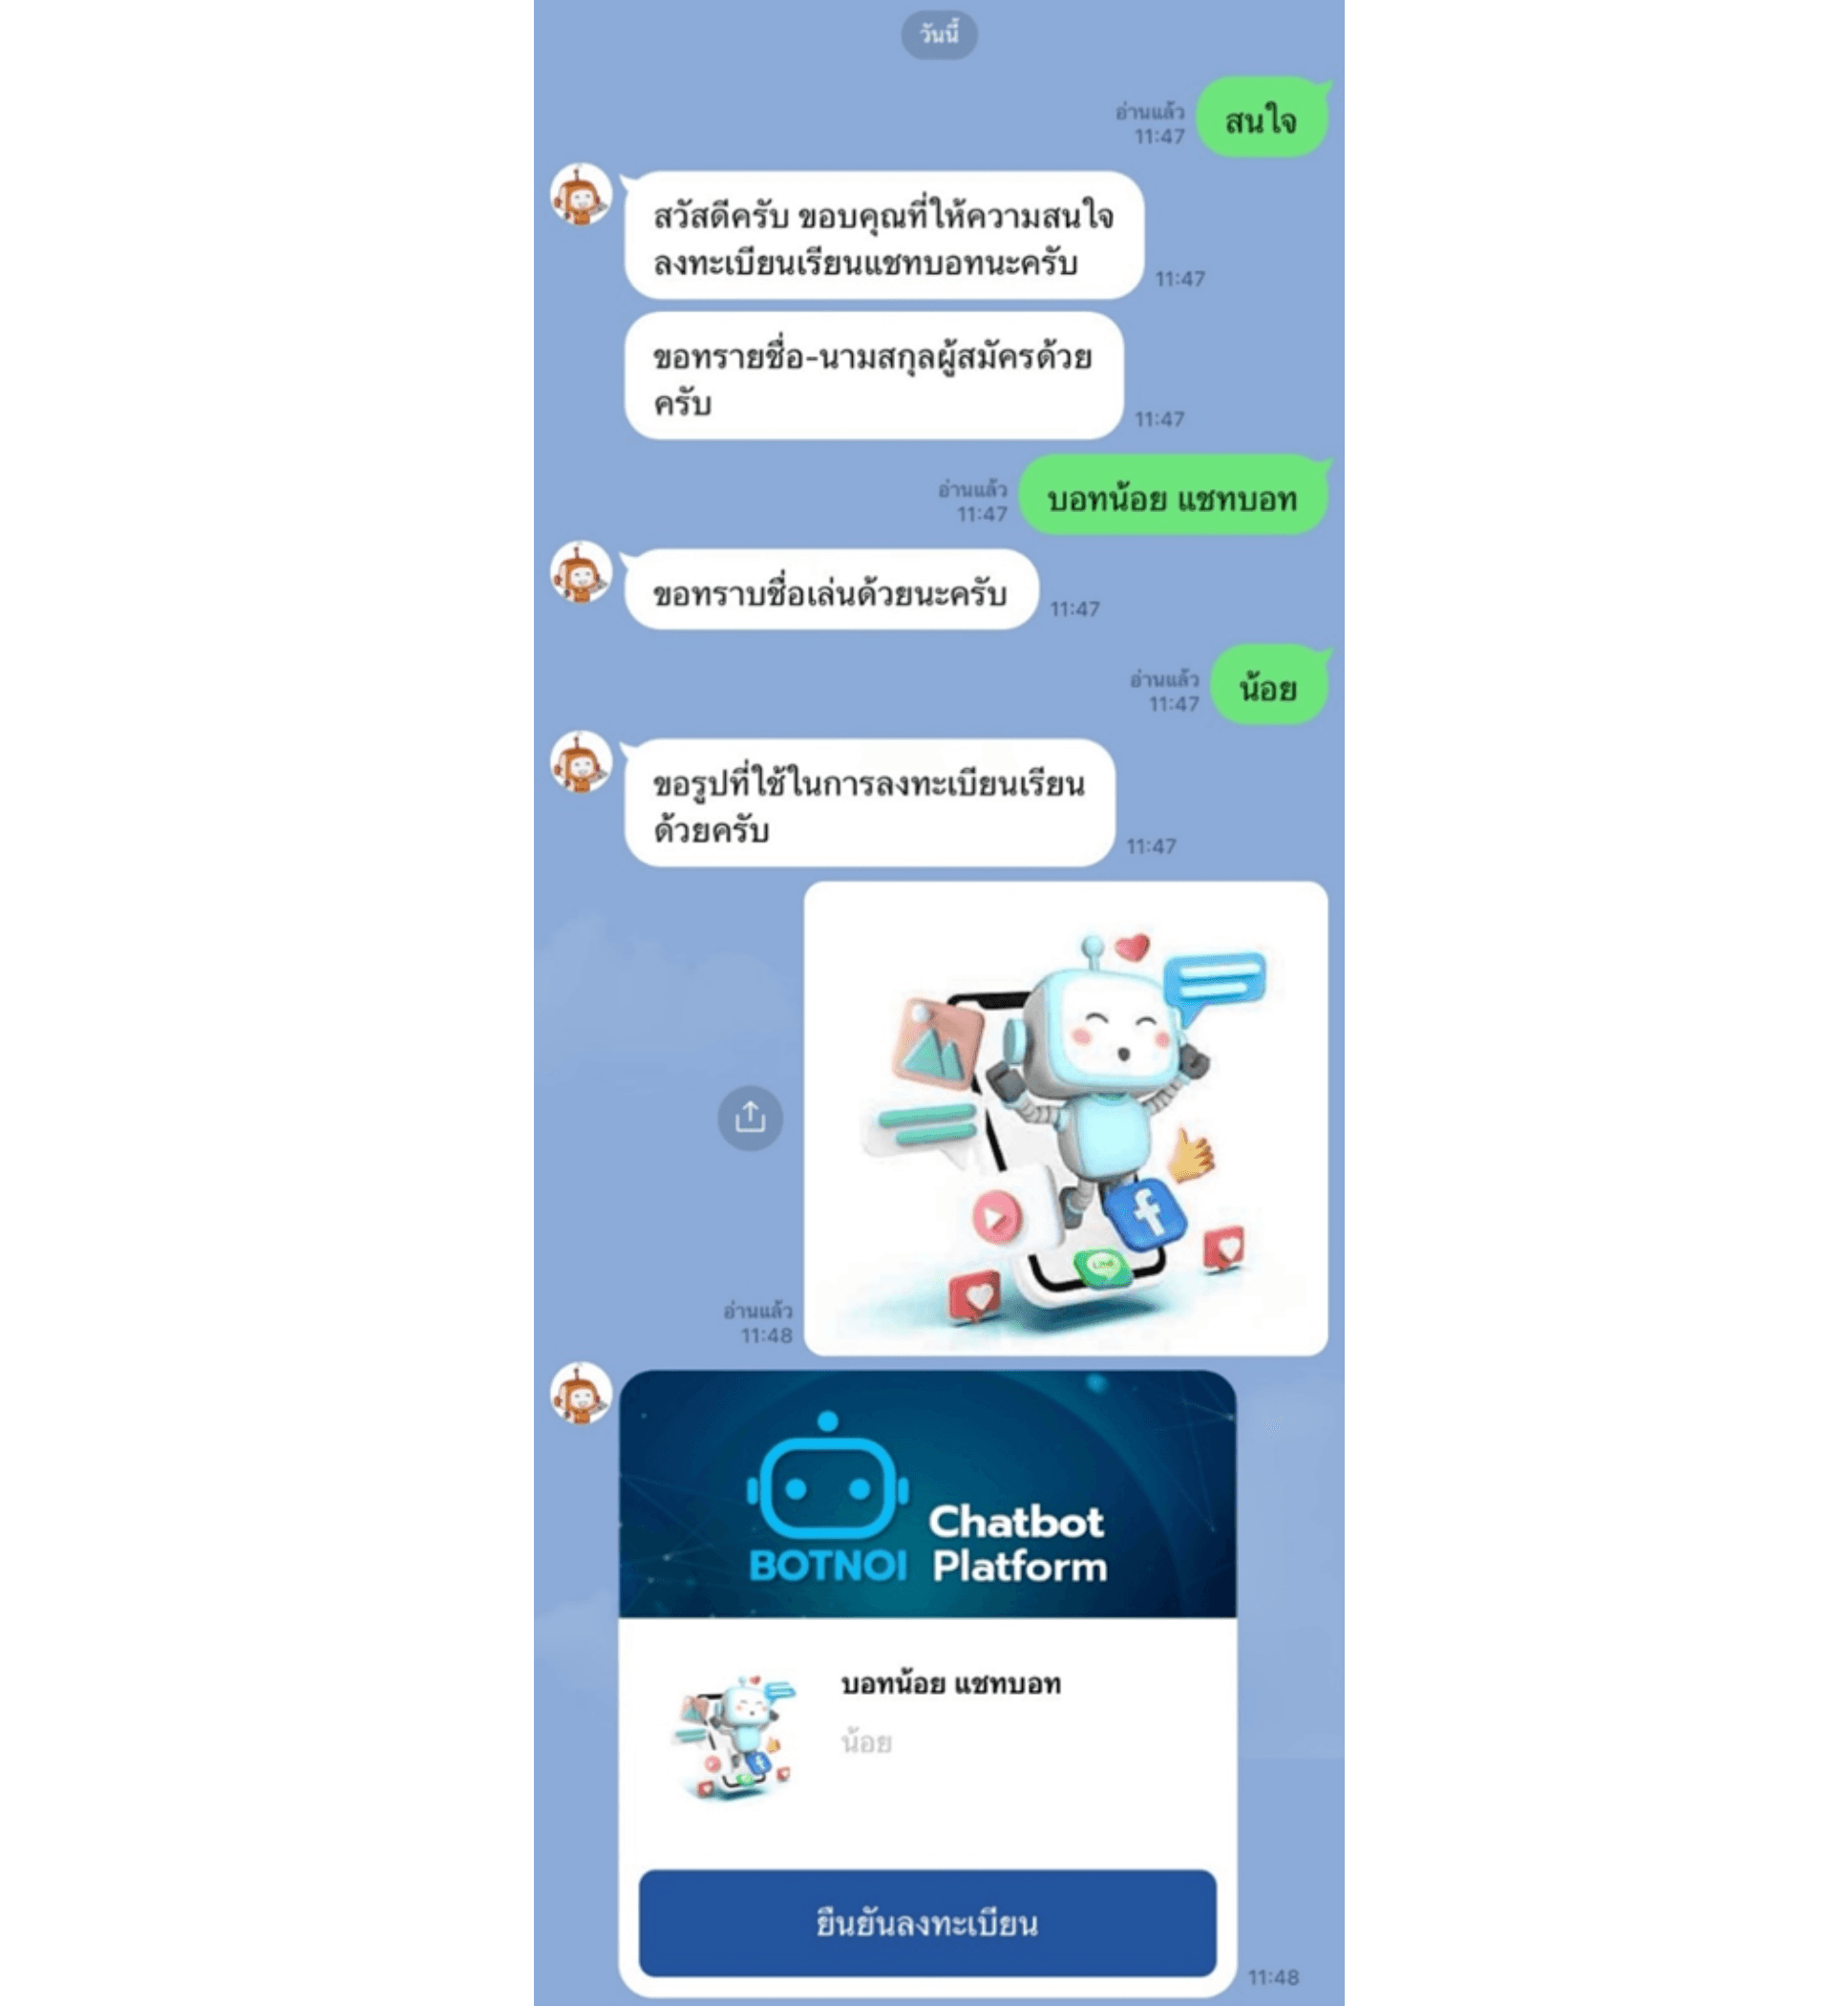
When you’re ready to go, we’ll show you how to do it step-by-step! Below we also have a tutorial video you can watch and follow along with:
Step 1: Understanding the Concept and Principles

First, let’s understand what we’re building. We set it up so users can start the registration process by typing 'interested' to the bot, triggering the initial Intent for registration. This process collects the user's full name, nickname, and photo through a Dialogue that asks these questions. The responses are stored in various parameters we define
After collecting all the info, a Flex Message will display these details for the user to confirm before anything gets saved. The data is not sent to Google Sheets immediately; only after the user confirms by clicking a button in the Flex Message. A separate Intent handles the data submission.
This approach of using Flex Messages is ideal for building chatbots that collect registration information or form data from users. Users can review their input before it is saved to a database. This is suitable for tasks such as member registration, product orders, or providing contact details.
Step 2: Preparing the API for Data Exchange via Google Apps Script
Code workflow:
1. Open the desired Google Spreadsheet using its URL.

2. Extract and save parameters like “name”, “nickname” and “p_image_url”.

3. Access the data in the specified spreadsheet and save it using its name.

4. Record different data entries including automatic date and time in a single row but in different columns as specified.

5. Generate and return a response in text format.

6. Convert the JSON object to a JSON string and use ContentService to return the result.

Query Parameter
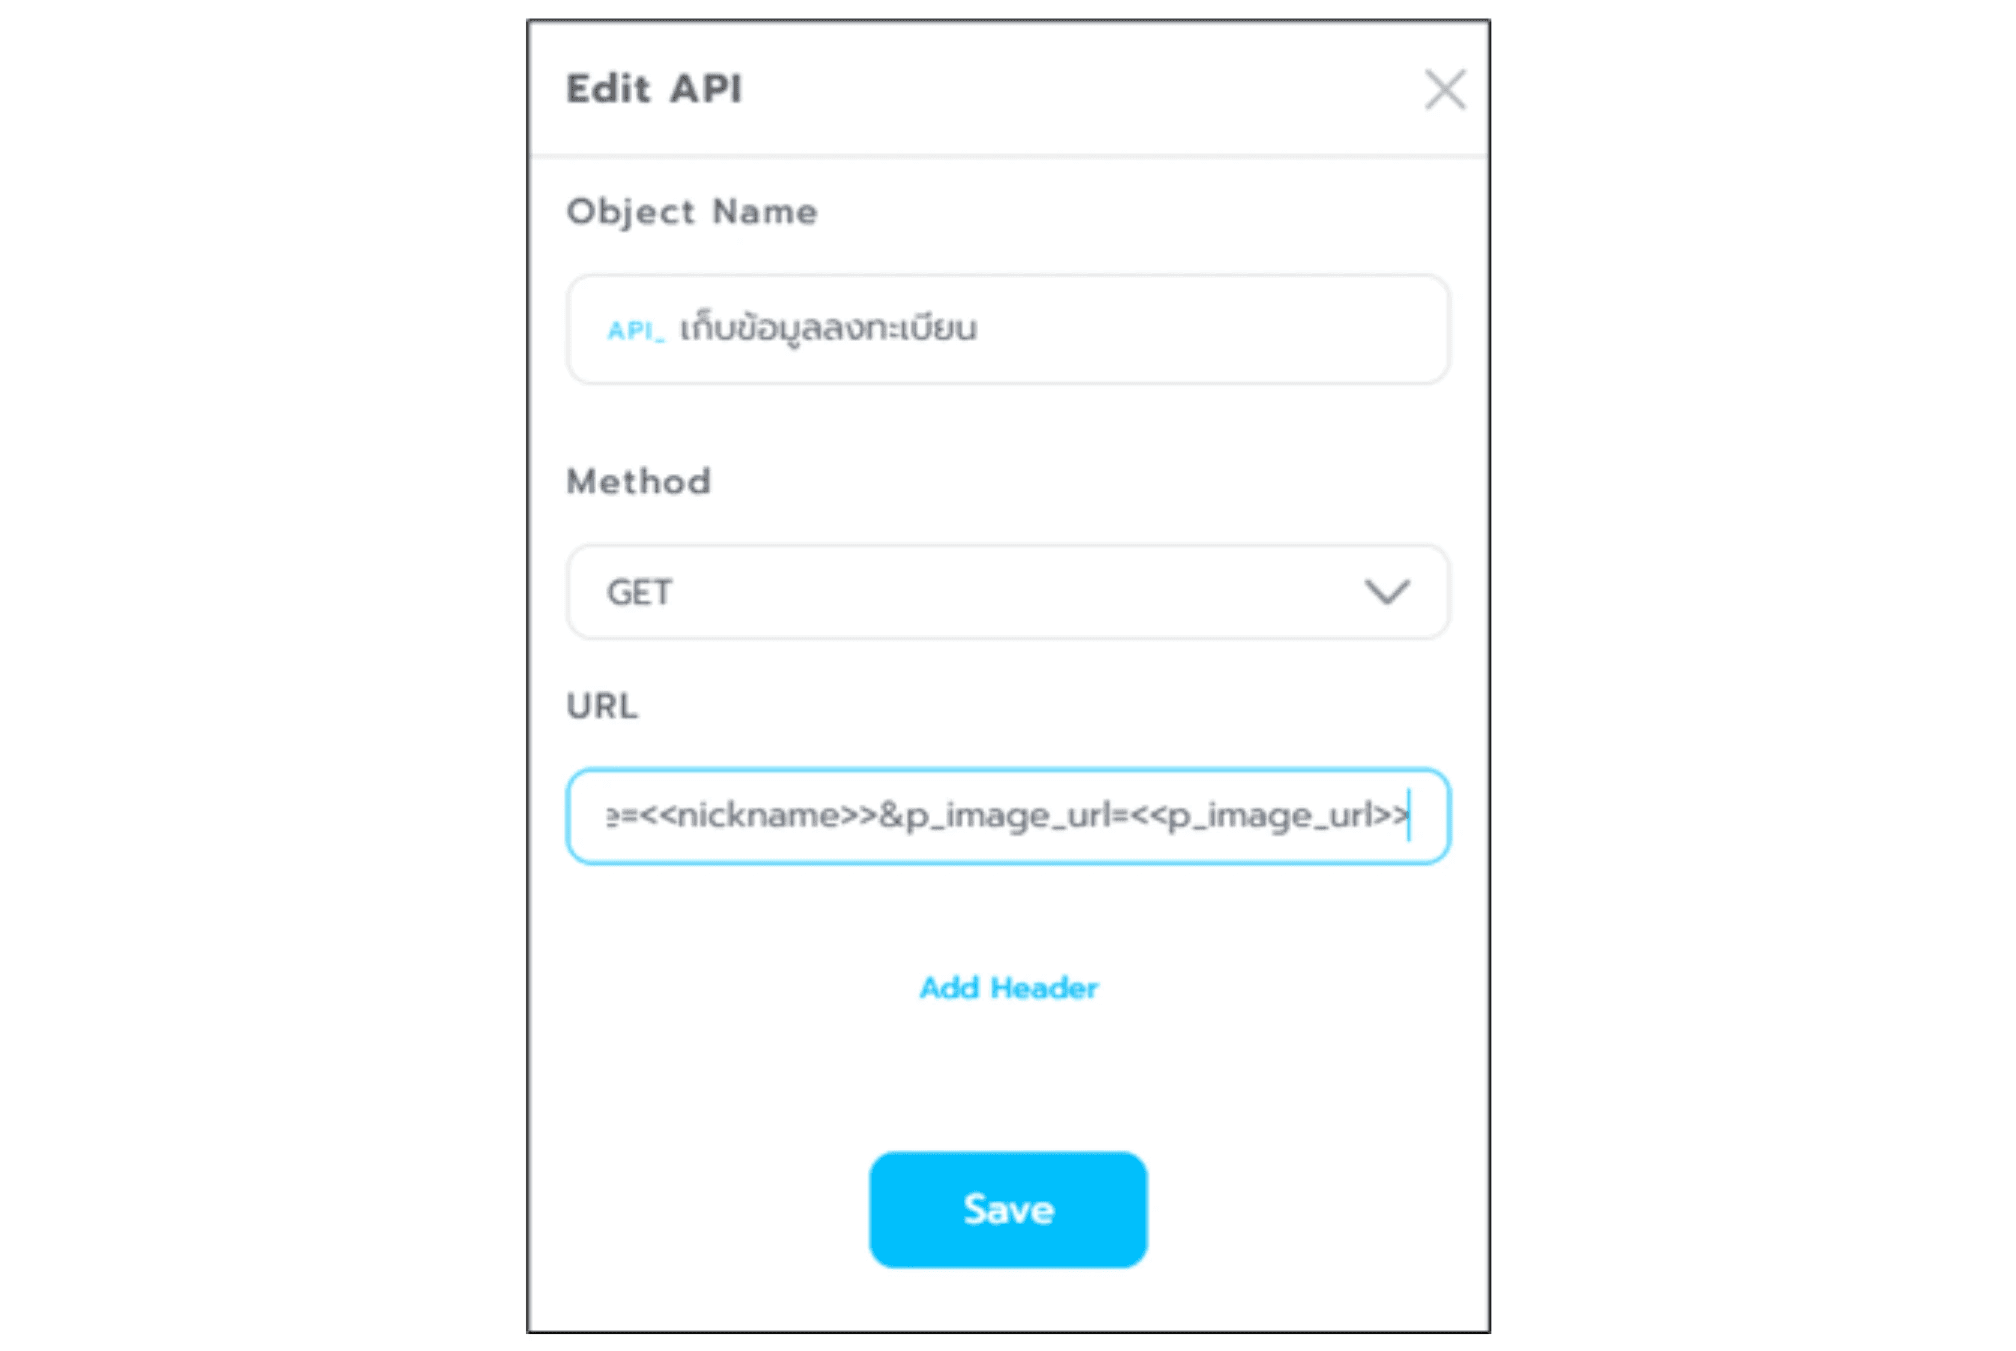
After you have run and tested the code and deployed the Google Apps Script web application, you can define query parameters in the URL by adding a `?` after the URL and specifying parameter values. For example, the code for Example 1 can be written as follows:

Variables in Google Apps Script must match the variables defined in the Botnoi.ai platform in the format `<<Parameter>>` and each variable must be specified.

In this code, there are three lines that request parameters in Google Apps Script, so the query parameters must include all three, with the parameter names (in green) matching those created in Botnoi.ai (in blue).
The `dateTime` parameter is automatically created in the code and does not need to be specified as a query parameter like the others. Once added, create a `Get` API and save it in Botnoi.ai. In this example, we will name the API as `Registration Data API`.
Modifying and Customizing Flex Messages
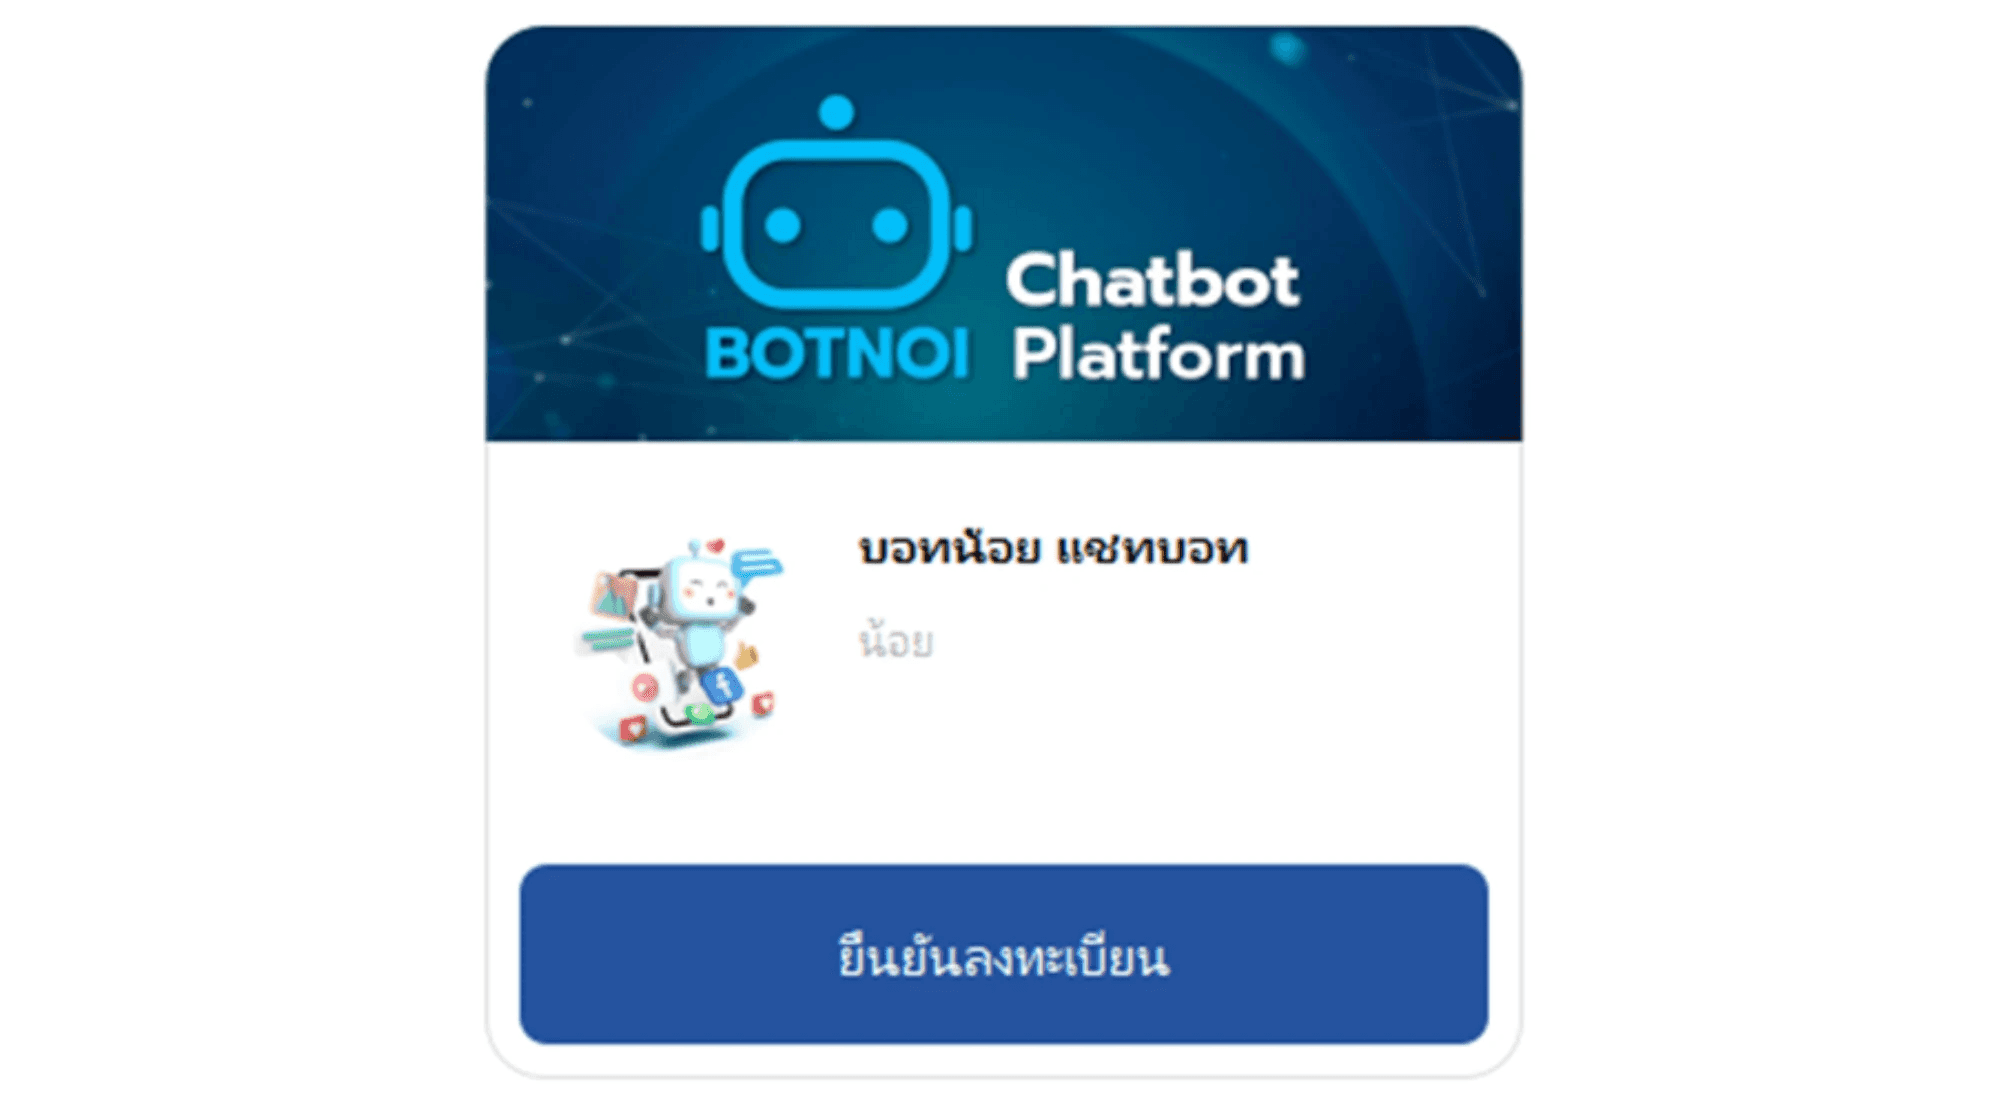
When designing the elements of a Flex message, it is important to parameterize the data section to create a Dynamic Flex message.
As mentioned earlier, we collect the user's full name, nickname and profile picture used during registration. These can be assigned parameter names in the format `<<Parameter>>`.
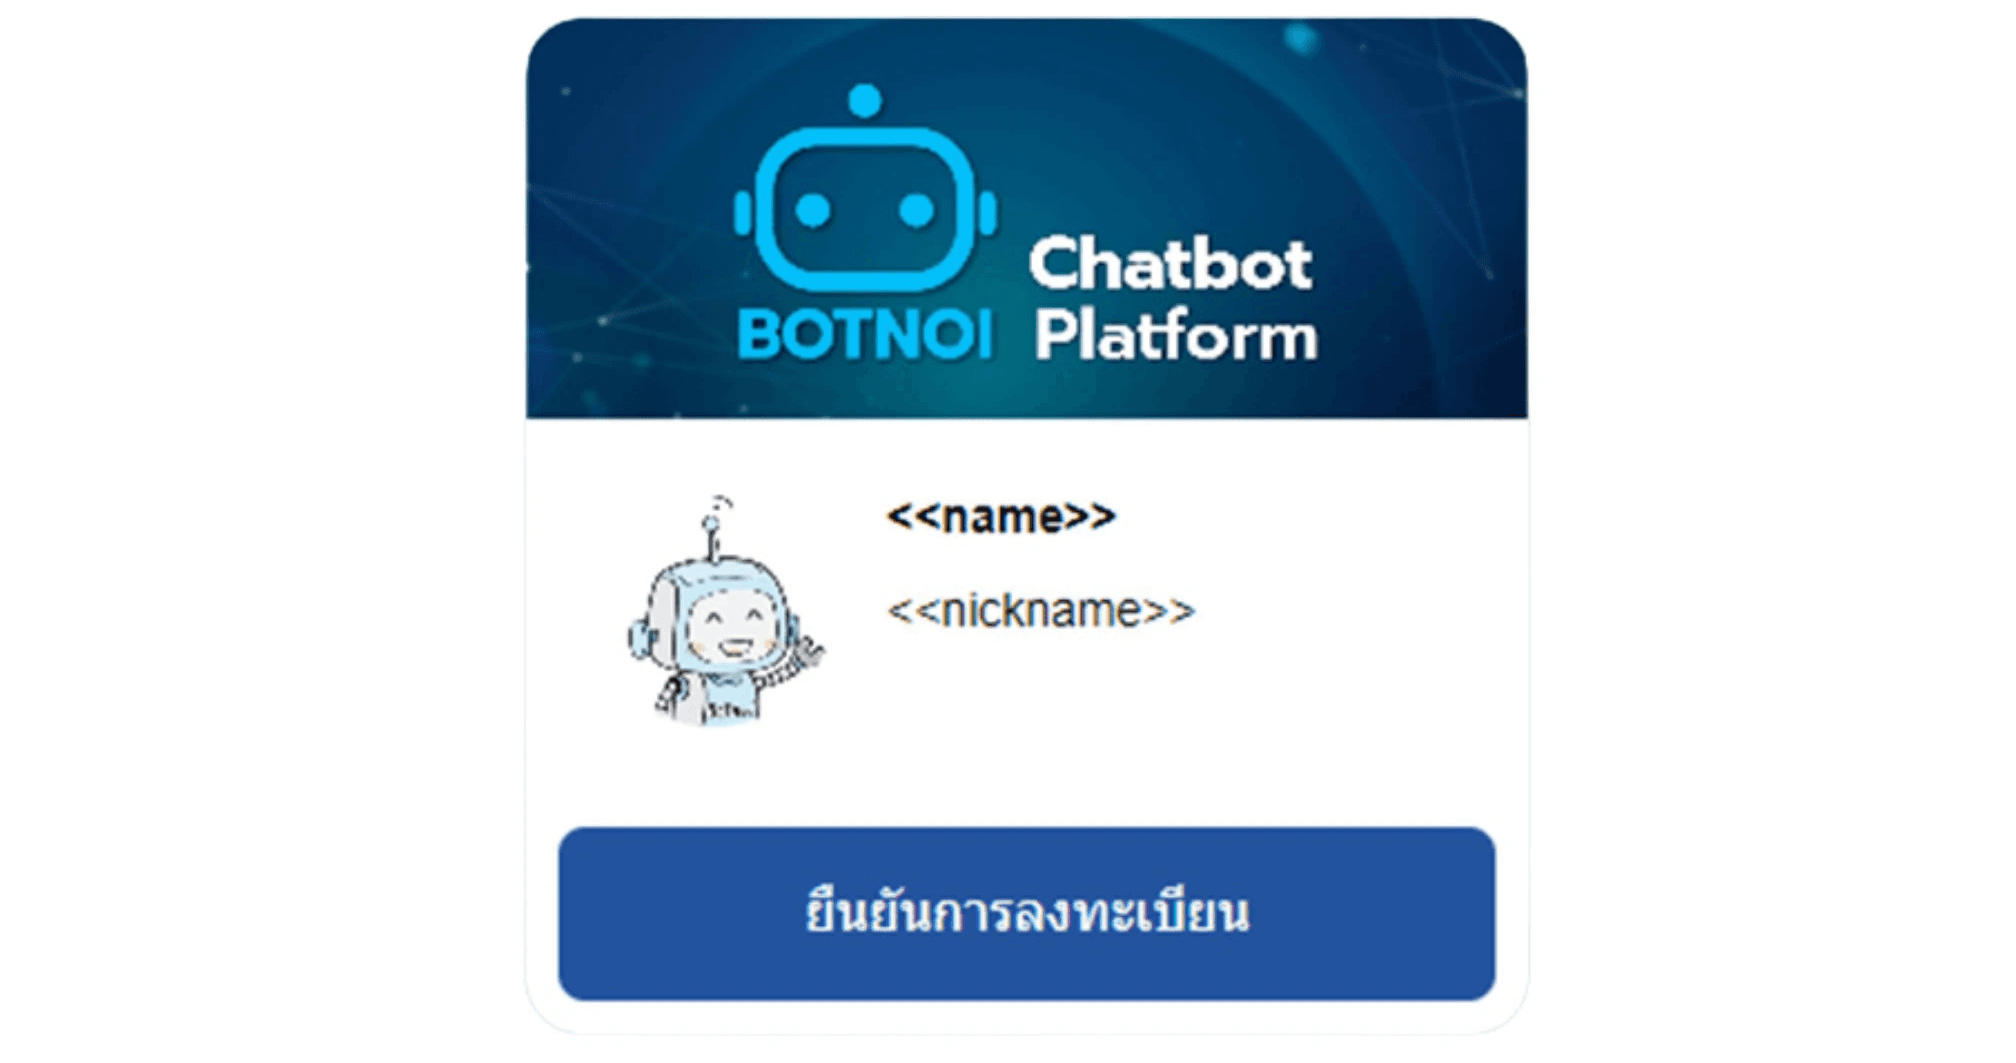
With LINE's Flex Message Simulator, you can easily edit various information into the parameter format directly on the Flex Message Simulator web page. Be sure to change the parameters for images and actions last.
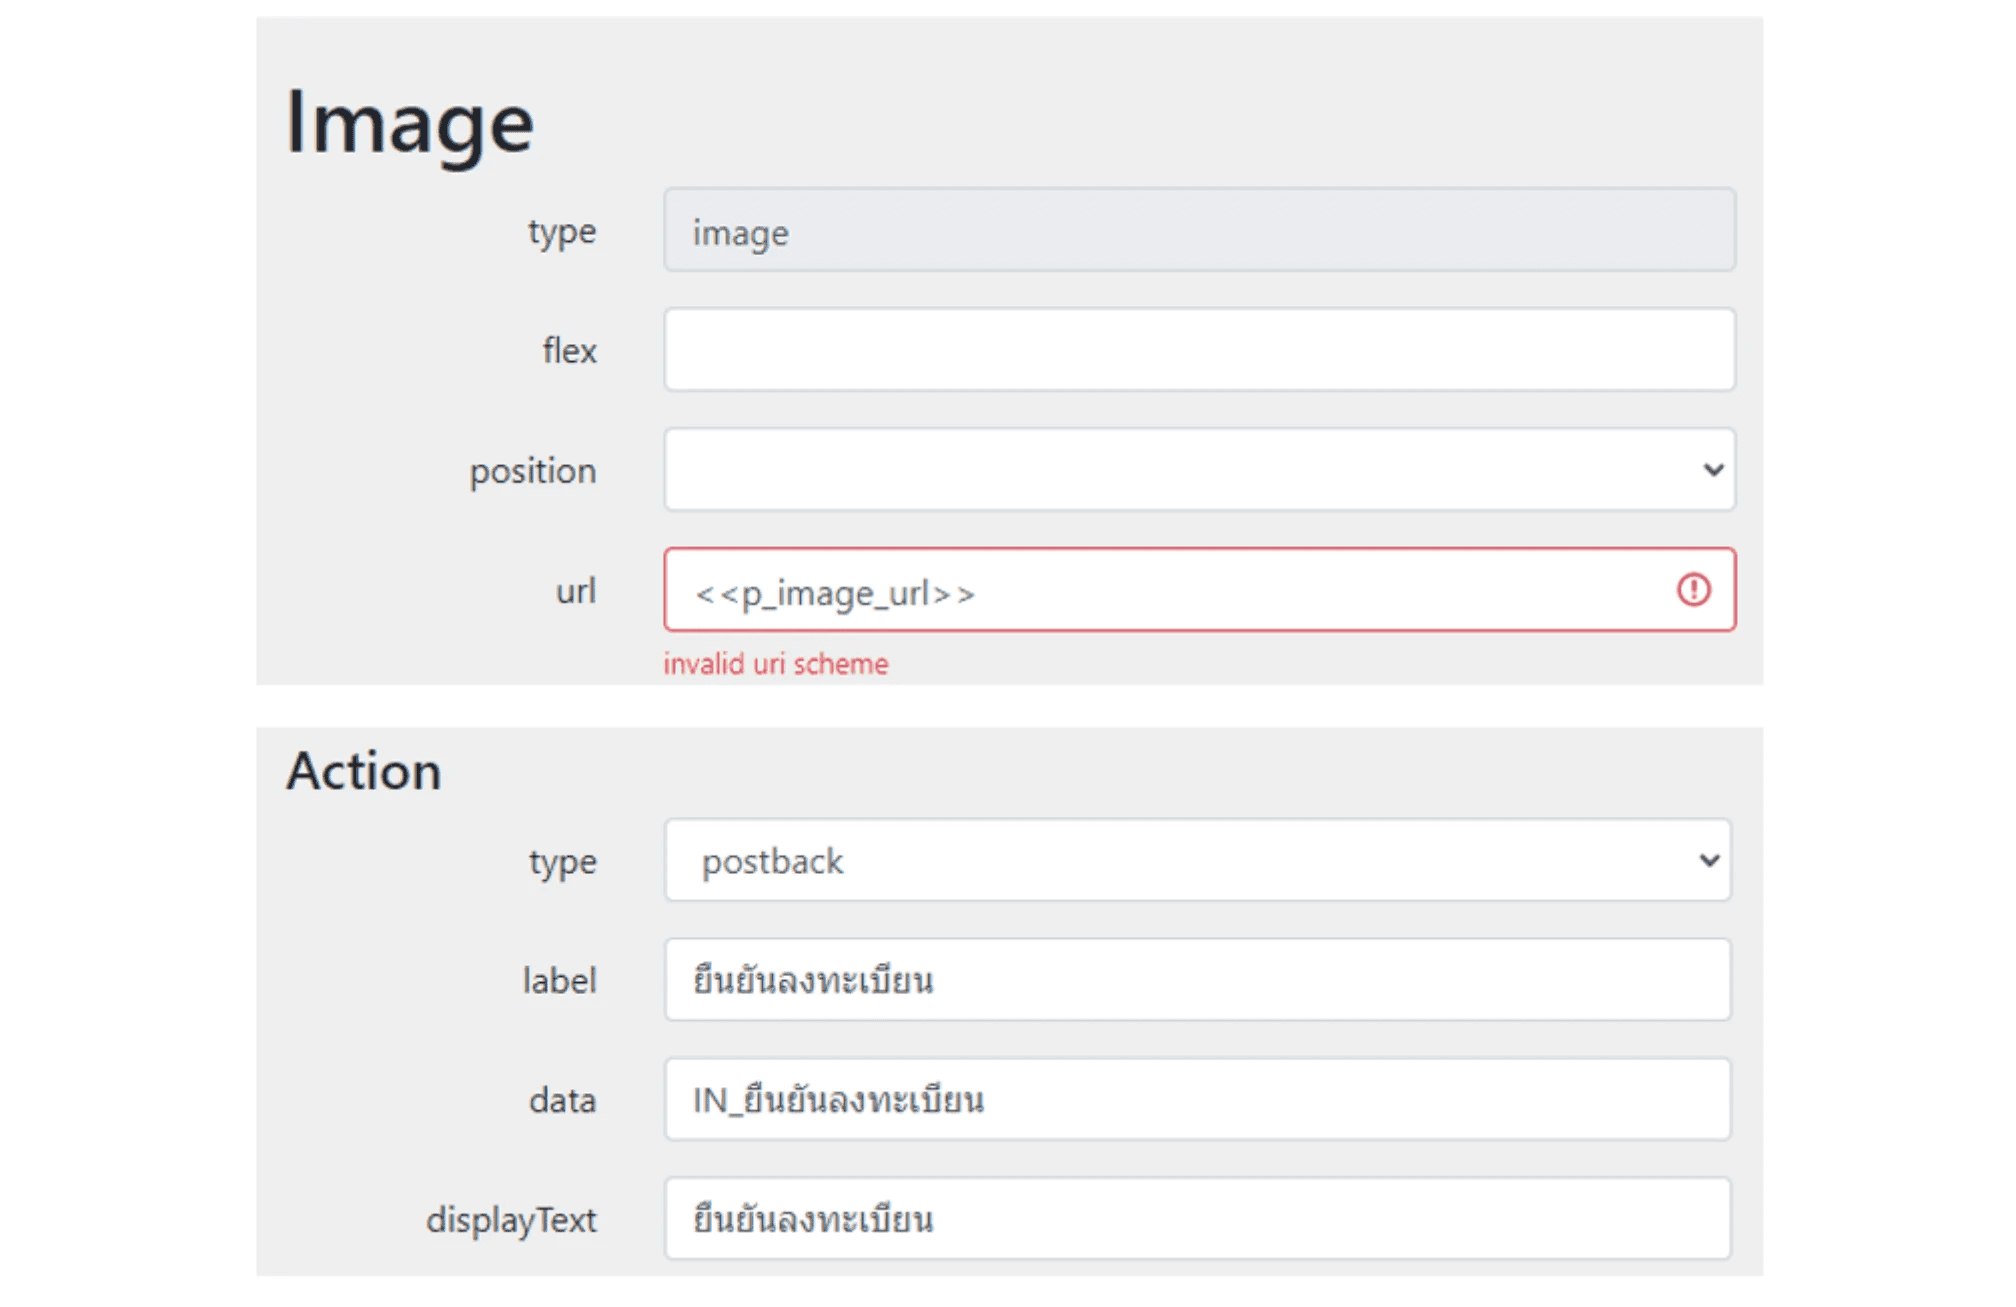
After editing, the sample image in the Flex Message in the Preview Area might disappear and show a warning. Don't worry; it means the Flex code is updated with parameters.
The confirmation button should be set to `postback` to trigger actions defined in the `data` field. Once the user confirms, it will proceed to the `Confirm Registration Intent`. After making all these adjustments, you can copy the JSON code using the `View as JSON` button on the top right corner of the webpage and save it into the Botnoi.ai platform.
Step 3: Creating Dialogues on the Botnoi.ai Platform
To collect registration data, using Dialogues to store information in parameters is ideal since the questions follow a sequence. However, the disadvantage is that users cannot stop data collection in the middle; they must answer all the questions.
For a smooth registration experience via LINE chat, it is recommended to limit the number of questions to ensure a good User Experience (UX). This is what the dialog used to collect registration data looks like:
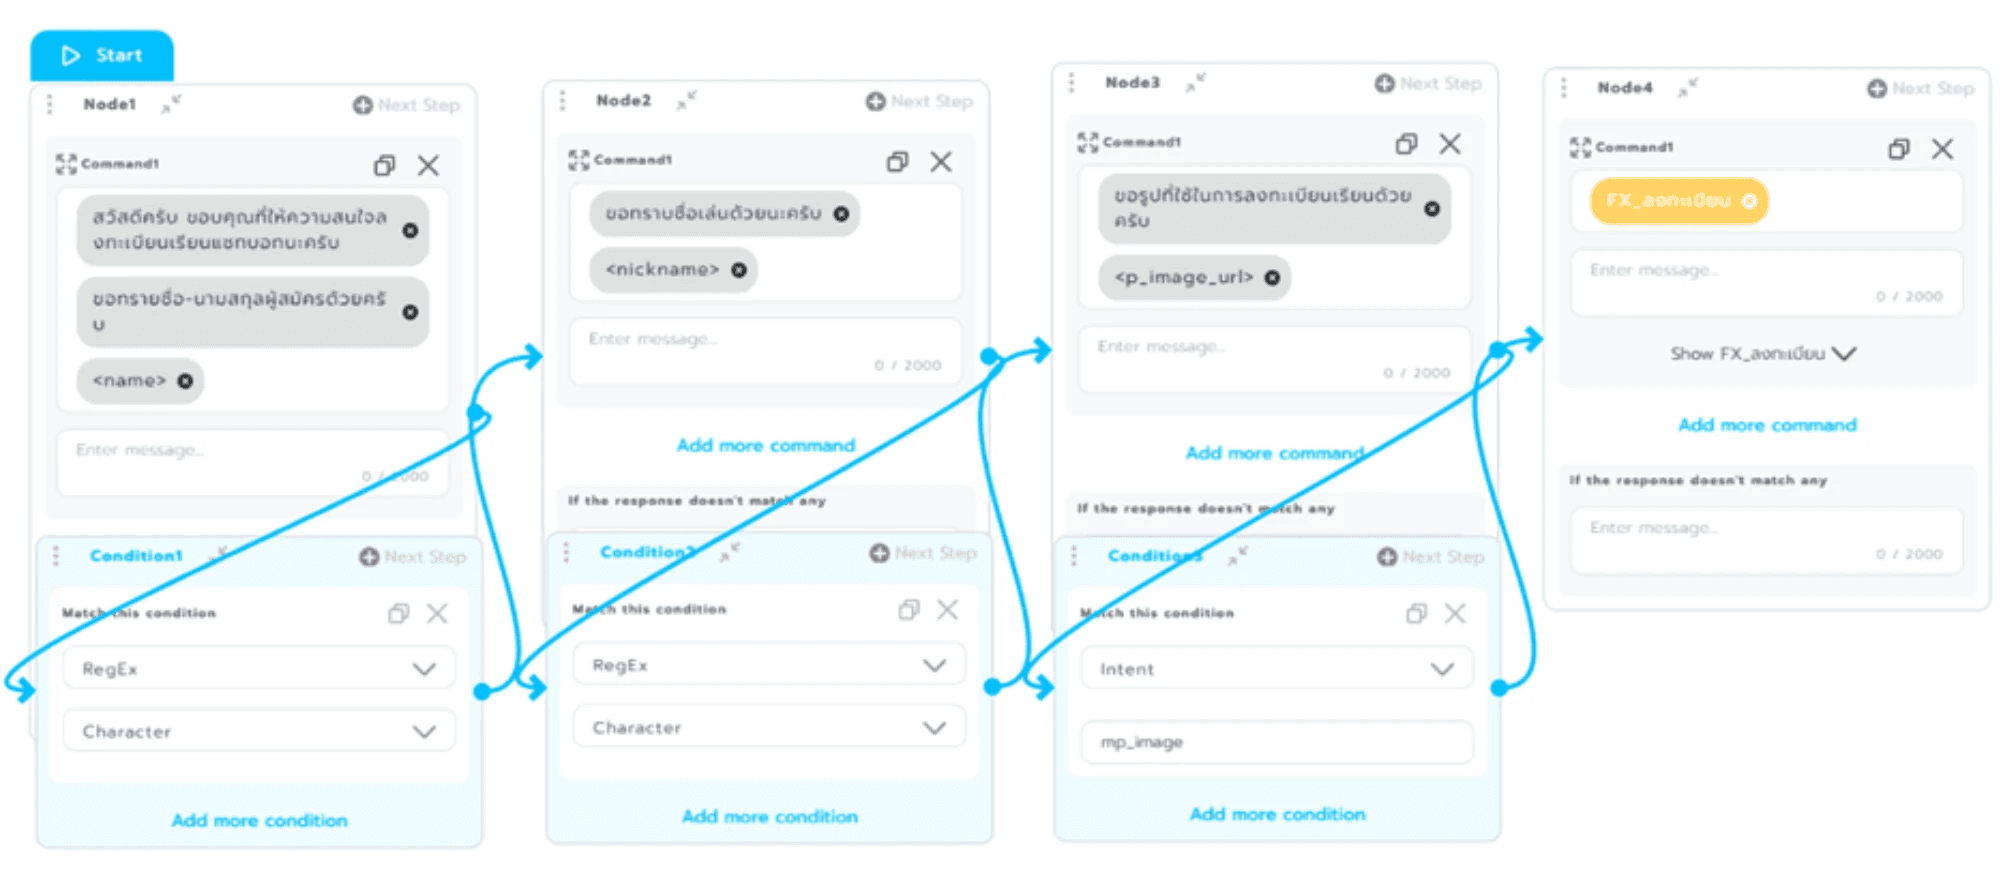
Set text response questions to `Condition: RegEx` or `Character`. For responses that require images, set the condition to `Condition: Intent`, `mp_image_url`. It’s crucial that image parameters are set as `<<p_image_url>>` to display the user's uploaded photo in the Flex Message. Add a Flex Message node at the end to show the stored data again.
A useful tip: once users have filled in their details and received their Flex Message with their own data, this message can be recalled anytime with the same data unless new values replace the existing ones (e.g., when users re-enter the registration Intent).
Step 4: Creating Intents on the Botnoi.ai Platform
Here we will use two Intents: one for capturing messages from users indicating interest in registration, and another for submitting registration data. Name them `Register Interest Intent` and `Confirm Registration Intent`, respectively. Here’s how to set them up:

Register Interest Intent:
Expected Phrase: Train it with messages that show the intention to register.
Response: The Dialogue we created to collect user information.
Confirm Registration Intent:
Expected Phrase: No training needed.
Response: The API created earlier, returning a success message when data is recorded.

All set? Now you can test the process to make sure the data (full name, nickname, and photo URL) gets correctly saved in the intended Google Sheet.

And that's it! You've created a dynamic chatbot that uses Flex Messages to retrieve and save data from Google Sheets. How did it go? Is the method and concept clear? We made it so that the steps are not too complicated, so even people without any programming knowledge can follow along!
Stay Connected: For more tutorials and tips, visit Botnoi.ai and join our community on Facebook at "AI Chatbot by BOTNOI" to discuss and share ideas about AI and Chatbots. Let’s keep learning and building together!
Platform for Creating Chatbots: Botnoi.ai
Next Episode: EP.2
กลับ


