
AI Chatbot By BOTNOI
Feb 6, 2024
Hey, budding coders! Today we'll show you how to pull data from Google Sheets and display it in Flex Messages using Botnoi.ai. This method automatically updates the Flex Message whenever you change the data in your Google Sheet. It’s a neat trick that’s not only efficient but also pretty simple. Let’s get started!
How Does a Flex Message Displaying Data from Google Sheets Look?
In this second episode, what we have here is a Flex Message that is designed to show data based on a search query. Imagine you have some data in Google Sheets, and you want to pull specific information based on user input. Using Botnoi.ai, we can easily do this by storing the user’s search term in the <<PARAMETER>> and then fetching the corresponding row from the sheet. This tutorial is perfect for creating dynamic, responsive chatbots that can fetch and display data on the fly.
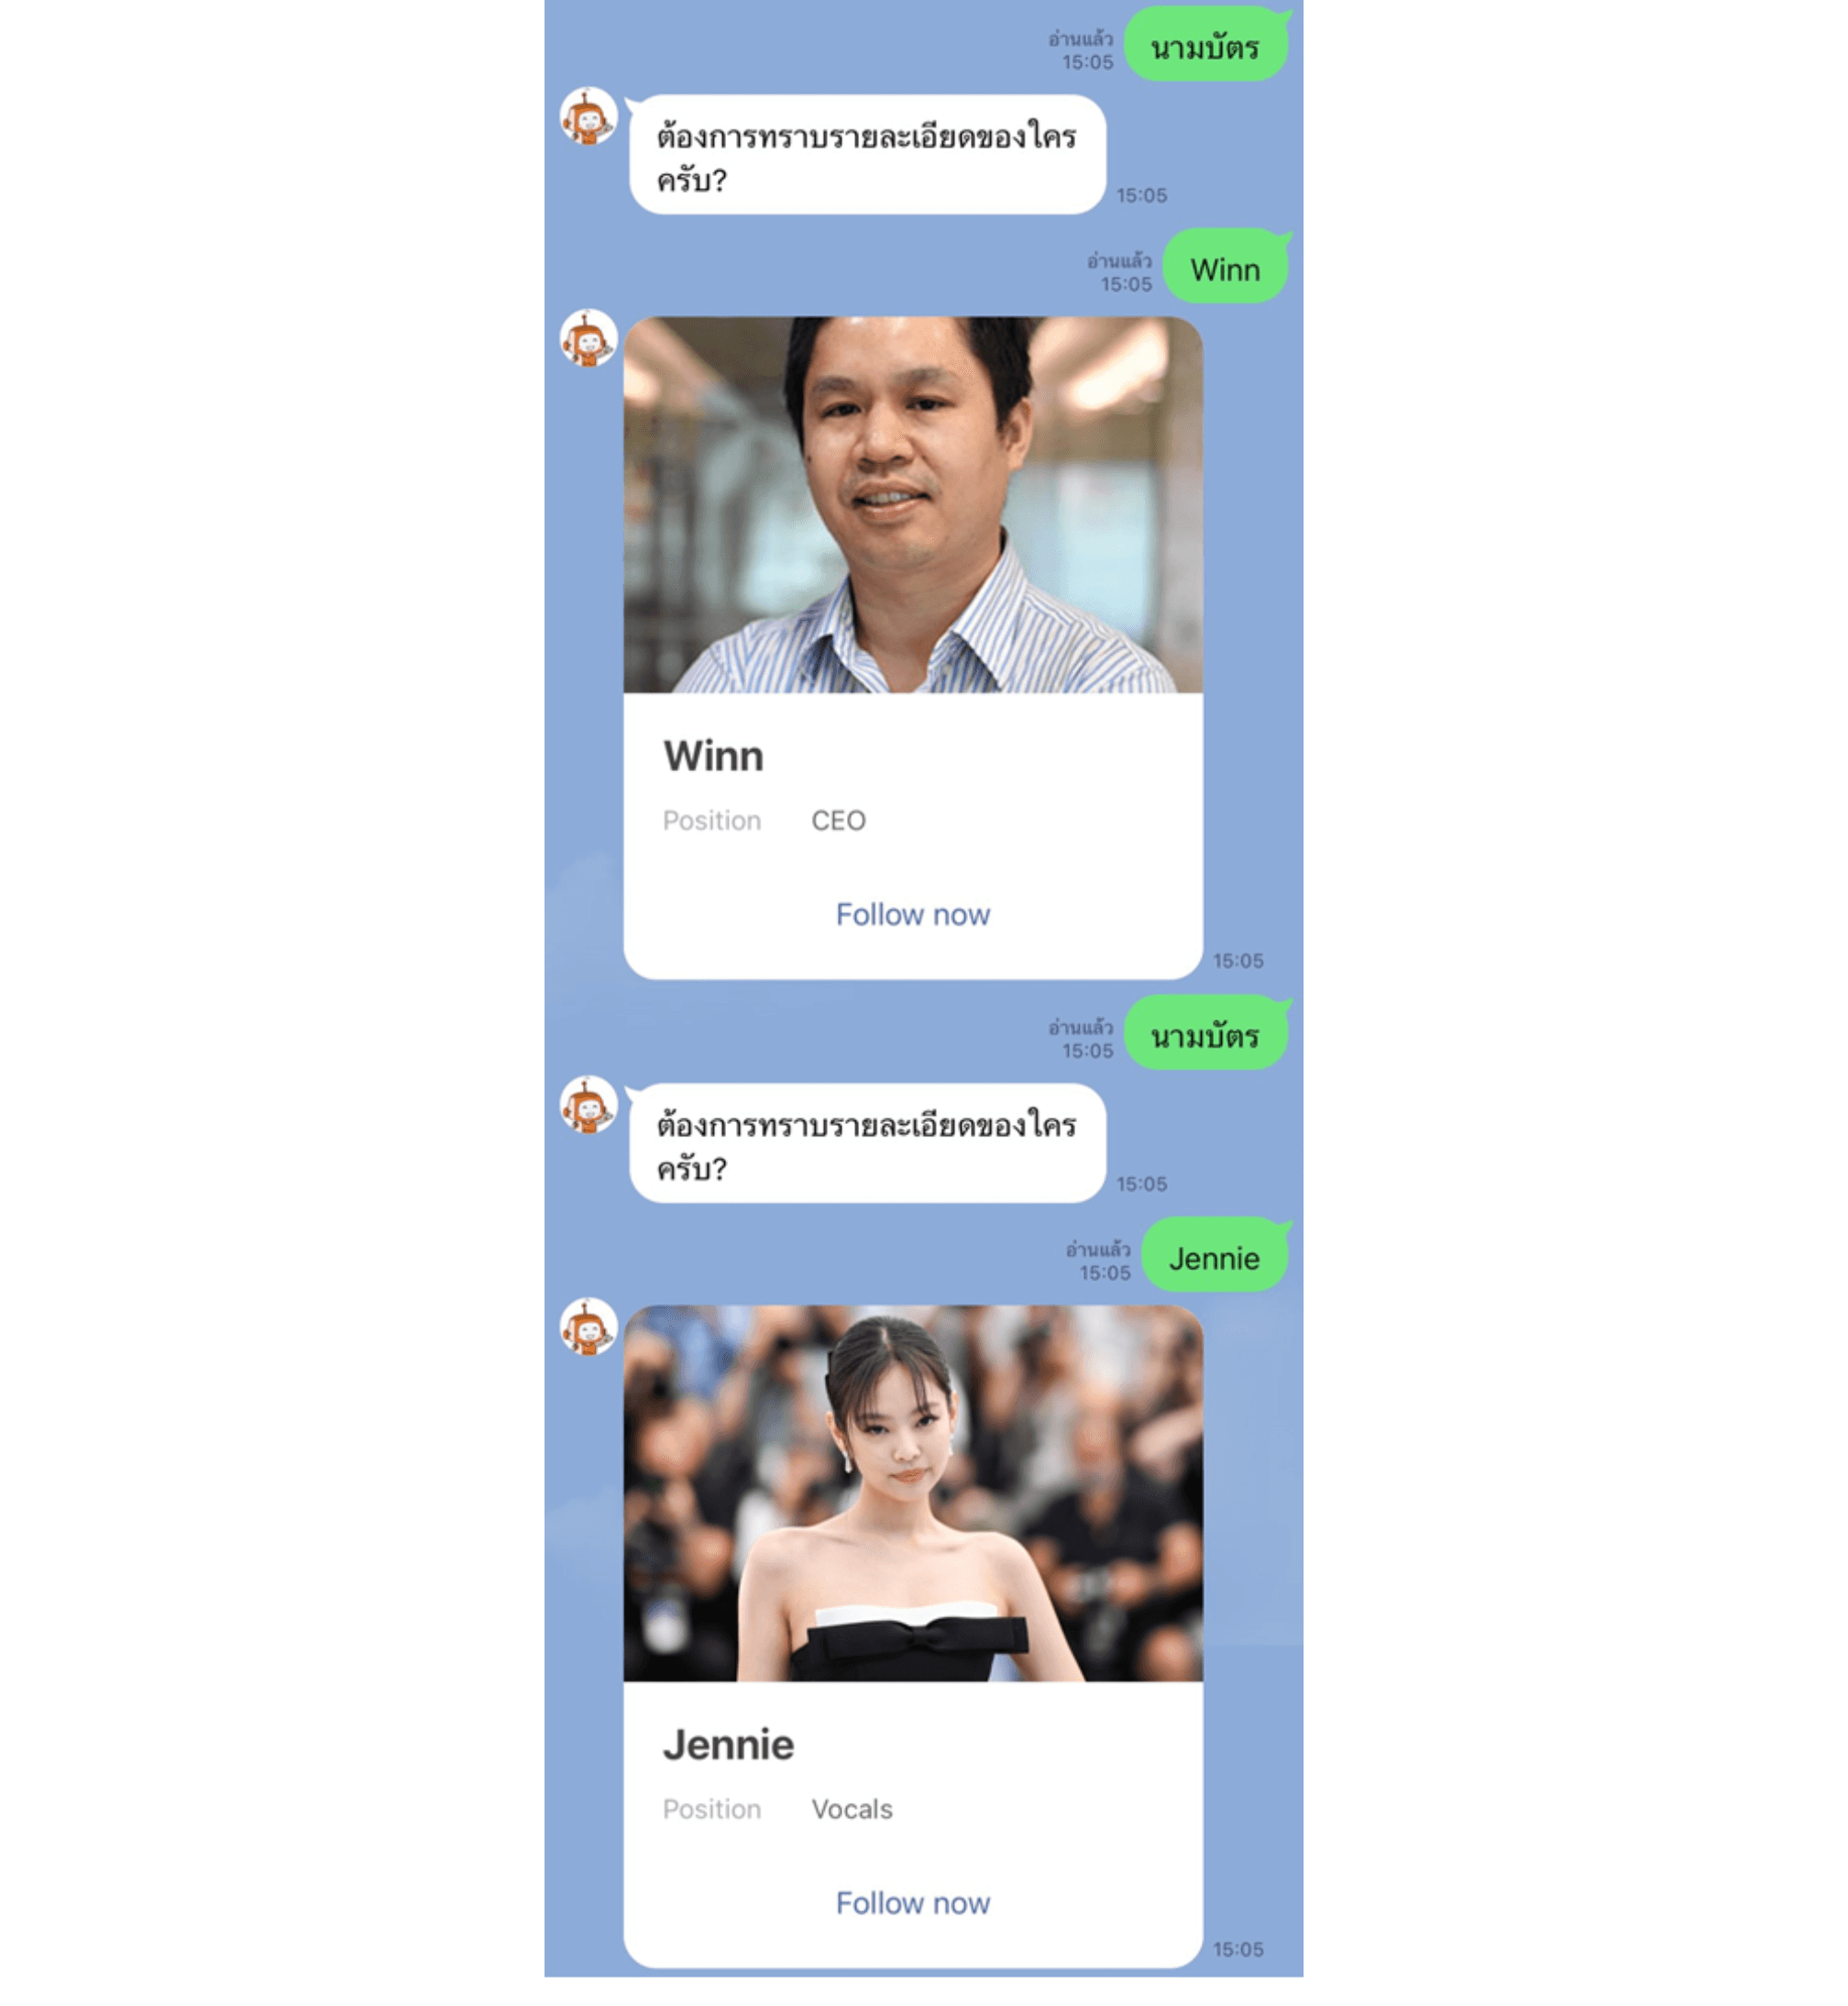
Excited to start? Follow along with the steps and check out our tutorial video below for a hands-on guide
Step 1: Understanding the Concept and Principles
First things first, let's break down how this works. Principles for doing Dynamic Flex in this example can be summarized with the following image:

We will set it so that if the user types a message indicating that they want to know information about employees in the company. The bot will ask whose information you want to know. When the user has to type the name, send it to the <name> parameter and send the data to the API.
Then the API will use the name obtained to search for other information such as location, picture, and contact channel in the same row as the name <name> in Google Sheet. Finally, the value will be displayed via Flex Message.
This function is suitable for searching and displaying information according to specified conditions. Whether that condition is a Customer ID message or any specific information, such as sending a drink menu when the user wants a drink menu. Sending details of customer booking history Business card information of employees in the company, etc. You could use it pretty much for everything!

Step 2: Preparing the API for Data Exchange with Google Apps Script
To exchange data with Google Sheets, we will set up an API using Google Apps Script. Here's how the code works:
1. Open Spreadsheet and select Sheet.

2. Pull parameters from request

3. Use findColumnValue to find the value in the specified column

4. Create an Object that stores the found values.

5. Create TextOutput in JSON format and set MIME Type.

6. findColumnValue function For searching for values in a given column.

Query Parameter
Once you’ve got the code working, deploy it as a web app from Google Apps Script. You need to specify the Query Parameter in the URL by adding ? after the URL and specify the parameter values after it, using the format that was explained in the first example. You can then create this Deploy Link and save it to the Botnoi.ai platform.
Editing and customizing Flex Messages

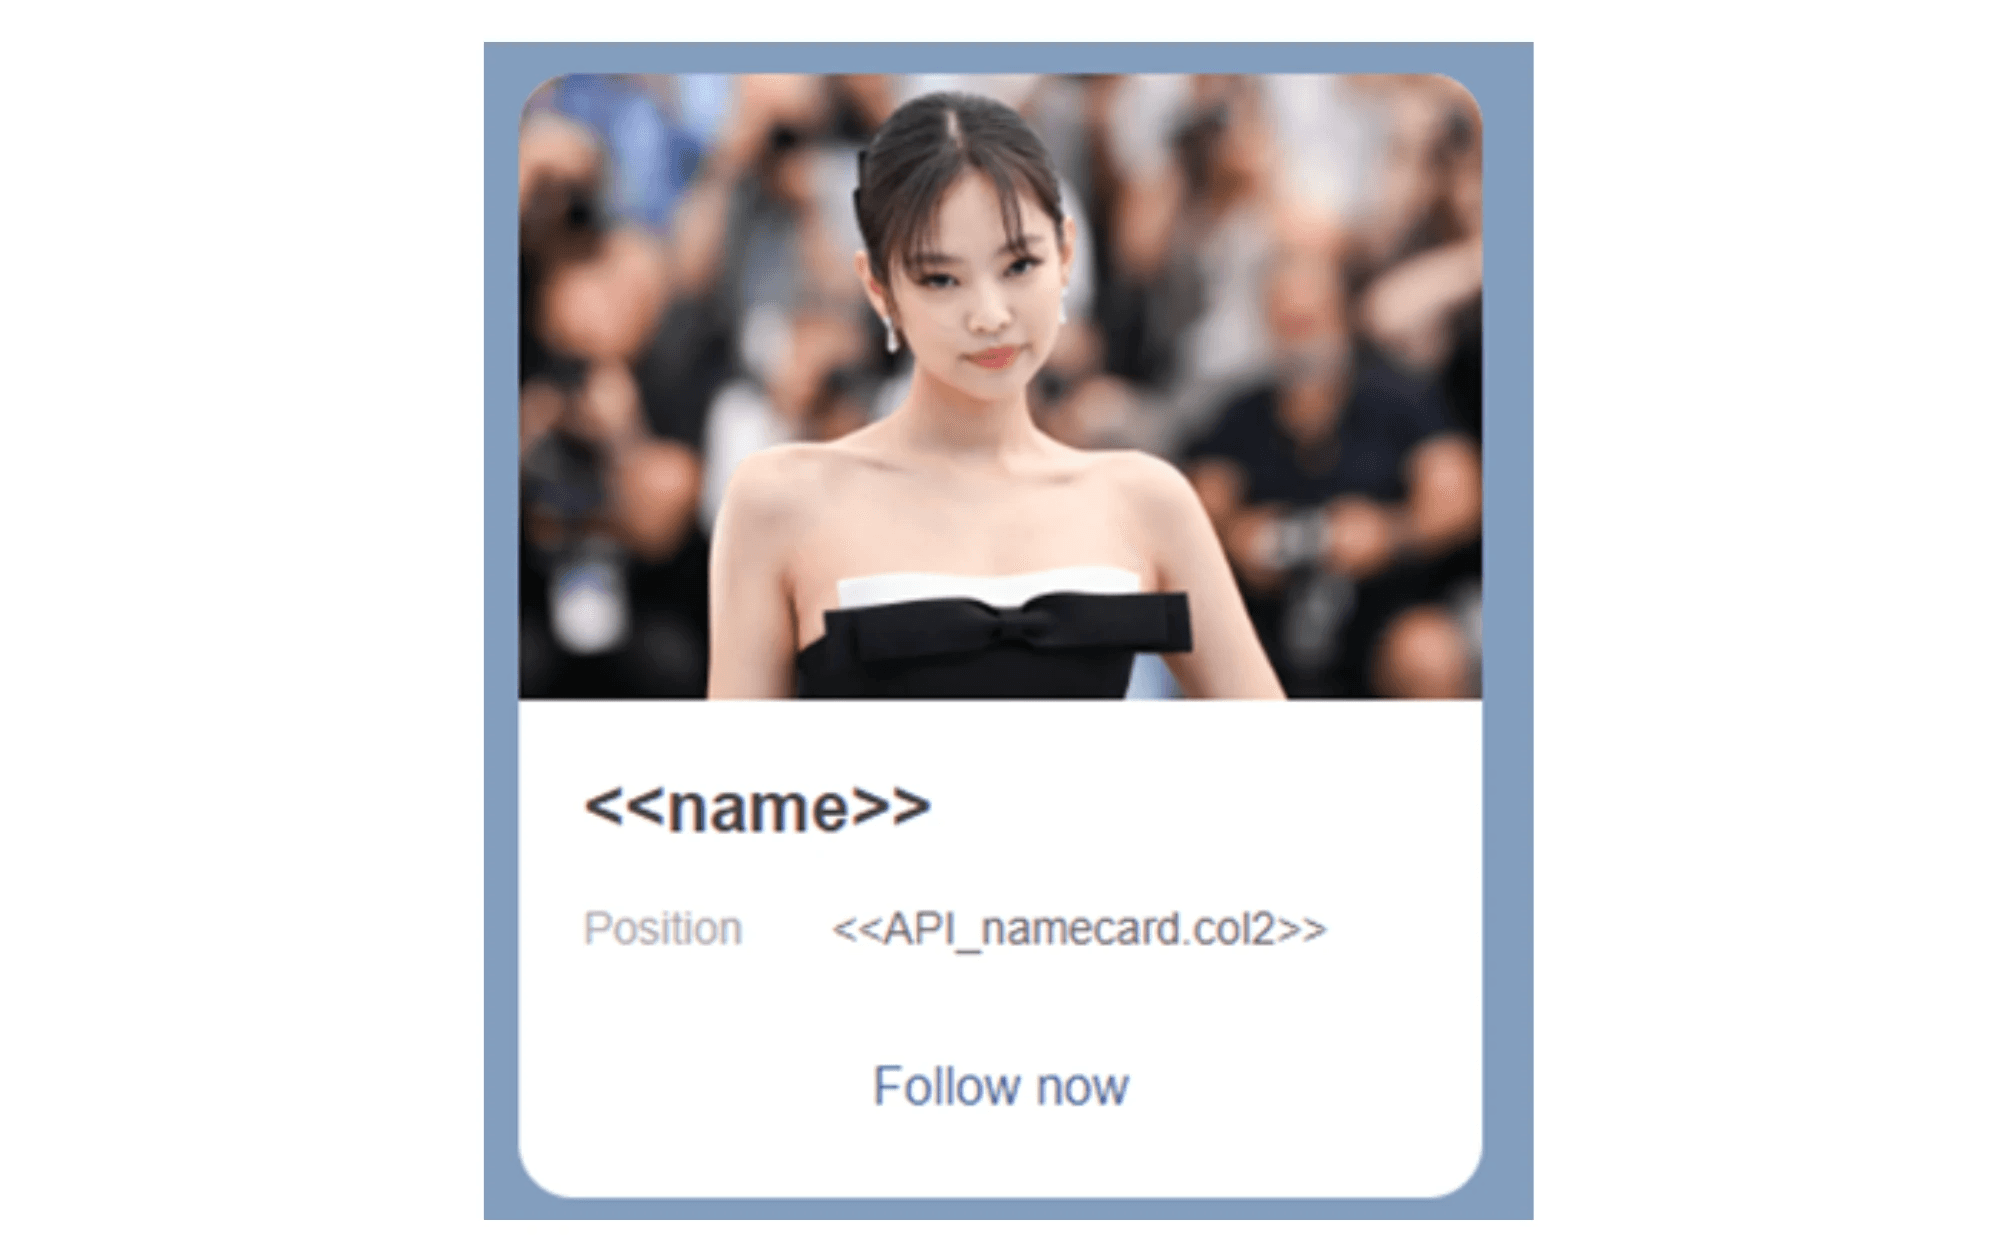
Once we have designed the Flex Message, it means that we have arranged the various elements well. There are 4 main elements that make it dynamic and can change information, consisting of a profile picture, name, position and contact channels entered as social media channels.
The principle of doing it uses the same principle as example 2, which is to call values from the API through the format for calling values: <<API_NAME.PARAMETER>>
The name that is retrieved is the same parameter that the bot asks from the user whose contact information it is looking for. The remaining two are the picture and the contact link, which need to be changed last, like in the example above.
Step 3 : Creating Dialogue in the botnoi.ai platform
For searching and displaying the right data, your search term must match exactly what’s in the Google Sheet. For example, the user must send a message that says “Winn” for it to be accepted. If it is “Win” or “Pee Win” then the information cannot be retrieved to be displayed. There are many ways to solve this problem, such as notifying with text, making an ImageMap, or making Flex to display information, etc. But in this example, we will use Quick Reply as an example.
What we will do here: Before creating a dialog, we need to create a quick reply that contains the correct name that we entered in Google Sheets to avoid errors caused by not finding information.
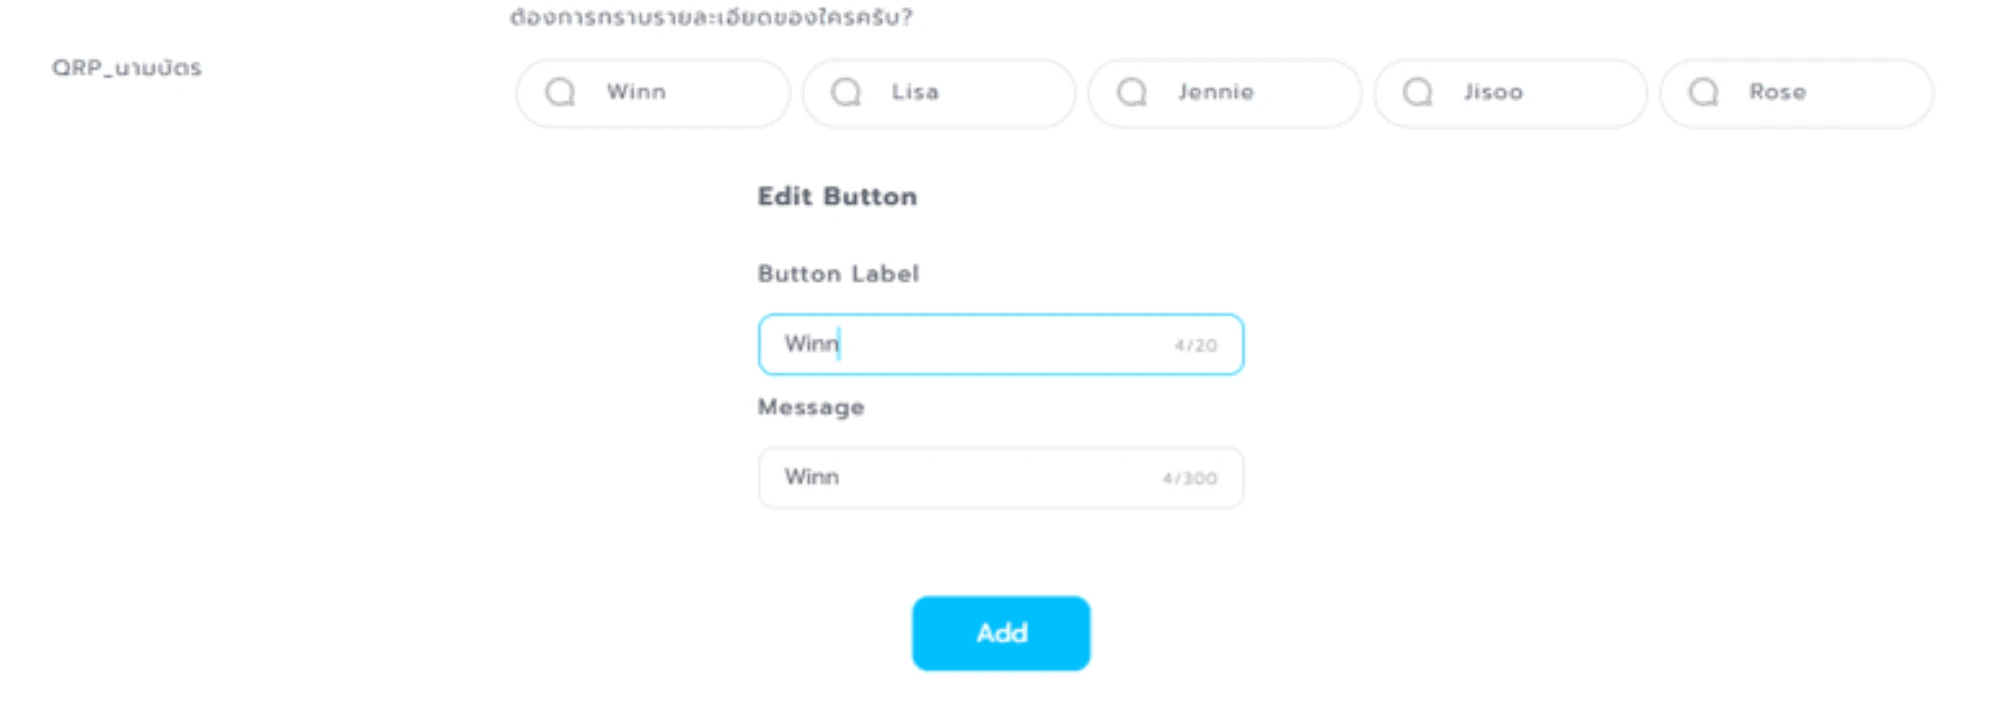
In this case, we use Dialogue to store the name chosen by the user. We consider this the easiest way to reduce errors when not finding information.
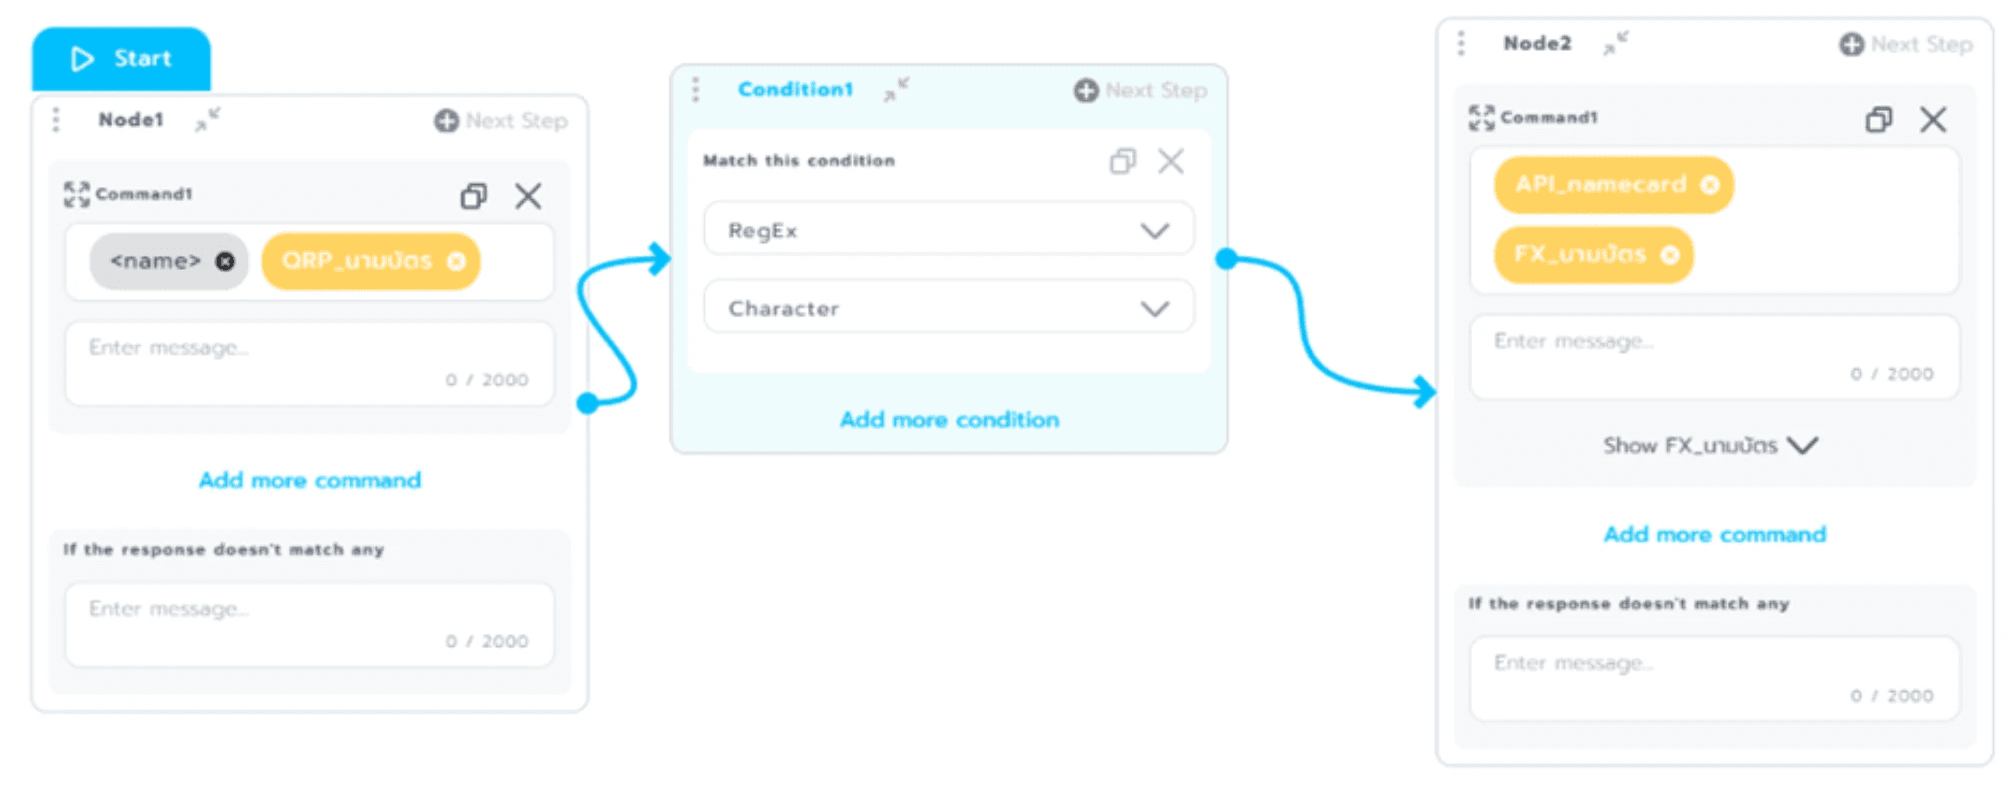
The principles for making Dialogue can be done as shown in the picture below. It starts by asking the name of the person the user wants to know contact information for. Set the user response condition to RegEx,Character, then add the previously created API and Flex respectively, and you're done.
Step 4: Creating Intents in the botnoi.ai platform

Finally, let’s set up Intents to handle what users type and respond with the right info. In the Intent section, enter the Response as shown in the image above. You can add the Dialogue you created to the previous content.

And that’s it! Pretty straightforward, right? These steps are so easy to follow that even if you’re new to coding, we’re sure that you can get this up and running. Plus, you can use this setup for all sorts of data displays in your chatbots.
Stay updated by following Botnoi Group and Botnoi AI on our website and Facebook. Join the “AI Chatbot by BOTNOI'' community to have exciting discussions about AI and chatbots!
Follow our latest news and activities: Botnoi Group
Platform for creating chatbots: Botnoi.ai
An example of a chatbot created by our interns: EP.1 Online store chatbot.
Previous video tutorial: Dynamic Flex Message, data collection method
Next part: EP.3
กลับ


